Wi-Fi Bridge
How to install WI-FI Bridge – Step by step
The BLACK X Wi-Fi Bridge enhances your smart lock by enabling remote access and control. This guide will walk you through the installation process to ensure a seamless setup.
By following these step-by-step instructions, you’ll have your Wi-Fi Bridge up and running in no time. Let’s get started!
Step 1: Unbox and Prepare Components
Included in the Box
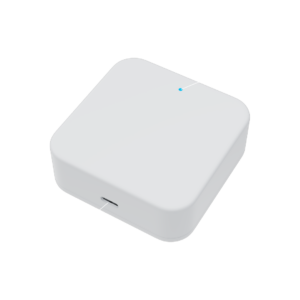
– BLACK X Wi-Fi Bridge
– Type-C USB Cable
– Quick Start Guide
Preparation
- Ensure you have access to a stable power socket near your Wi-Fi router.
- Confirm that you have already downloaded and set up the BLACK X App on your smartphone as part of the smart lock installation process.
Note: A USB power socket plug is not included with the Wi-Fi Bridge. You will need to purchase a compatible USB power socket plug separately to connect the bridge to a power outlet.
Step 2: Understand the Light Indicators on the Wi-Fi Bridge
Red and blue: Standby mode; ready to pair.
Red: Network failure or timeout
Blue: Pairing in progress or activated mode.
Troubleshooting:
If the indicator flashes red, unplug the Wi-Fi Bridge, wait for the lights to turn off completely, and then reconnect it to reset the pairing mode.
Step 3: Pair and activate the Wi-Fi Bridge on the BLACK X App
- Open the BLACK X App on your smartphone.
- Go to the menu and select “Bridges.”
- Connect the Type-C USB cable to the Wi-Fi Bridge and plug it into a power source using the compatible USB power socket plug. The bridge will power on and the indicator will flash red and blue.
- In the app, press the “+” button and select the relevant Wi-Fi bridge.
- Follow the prompts to pair your Wi-Fi Bridge. When the indicator starts flashing blue, the pairing process is in progress.
Troubleshooting:
If the indicator flashes red, unplug the Wi-Fi Bridge, wait for the lights to turn off completely, and then reconnect it to reset the pairing mode.
Step 4: Connect the Wi-Fi Bridge to Your Home Wi-Fi
- In the app, select “Wi-Fi Name” and choose your home Wi-Fi network.
Note: Please ensure you choose a Wi-Fi network that supports 2.4 GHz.
- Enter your Wi-Fi password and confirm.
- Assign a name to your Wi-Fi Bridge in the app and press “OK”. Once connected, the indicator light will flash blue every 1-2 seconds.
Troubleshooting:
If the app displays “Initialization Failed,” double-check your Wi-Fi password and ensure the Wi-Fi Bridge is within a 7-meter range of your router.
Step 5: Approve remote activation and test Your Wi-Fi Bridge
- Open the BLACK X App on your smartphone.
- Enter the setting of your BLACK X lock⚙️. click on “Lock remotely” and choose “activate”.
- Move out of the range of your home Wi-Fi network (e.g., step outside so you are out of your Wi-Fi range).
- Use the BLACK X App to remotely unlock your smart lock.
- Congratulations! You have successfully installed your Wi-Fi Bridge.
Troubleshooting:
If the lock does not respond:
- Ensure the Wi-Fi Bridge is powered on and properly connected to your Wi-Fi network.
- Verify that the Wi-Fi Bridge is within range of your lock.
- Check the green Wi-Fi connection indicator in the app (displayed on the home page of your BLACK X smart lock) to confirm the lock is connected to the Wi-Fi.
If the issue persists, revisit the setup process and repeat the pairing steps as needed.
🎥 Looking for a clearer walkthrough? Watch our step-by-step video tutorials below!


